Showing posts with label coldframe. Show all posts

16 April 2026

things growing

First true leaves of parsley!
My tomatoes have grown taller than the coldframe.
There's a few nights of frost still expected, I'll have to bring them in.
And move the plant cage again- it's now out on the deck protecting some things from my cat! I put a bit of fencing around the lower part of the deck railings, so the cats don't lean out so far looking like they'll jump. They really like hanging out on the deck with us now. But Eliza chomps all the plants. The foreground pot in here is of sprouted wheat I pulled out of the mulched beds and stuck in dirt for her- but I have to keep her from chewing it down to nothing, give her access to it only occasionally. Also protected are- thyme, chives (which she chewed a lot of) and dill. The mint pot is unsheltered, she leaves that one alone.
I also had to block her from getting onto the greenhouse shelves and biting plants in there. With the coldframe window.
The cats especially like being on the deck right now because there is a bird nesting under one corner of it- on top of that carpenter bee trap I hung.
Today I managed to get a few photos of it- I think they're house finches. The male has a rosy chest and head.
From above, you can put your eye to a crack between the boards and see straight into the nest- five small very pale blue eggs. I can't wait to see the baby birds hatch! 

03 April 2026

fixed

my coldframe. A temporary repair. 
All the boards across the back are rotting, so it was loose and wouldn't support the window lid when propped open. (That's what I get for leaving it outside in the weather all winter).
I just took off the top horizontal board, and the top half of the backstops/verticals. I thought there was not enough solid wood on the ends of the side boards for the screws to bite in again, but they're holding fine.
Put new vertical backstops on,
and now it is serviceable again.
Well, there is a gap on the back under the top board- I plugged it with a small plastic pane and a piece of foam. It will probably make it through this spring, then I have to replace more pieces or rebuild the whole thing entirely.
Not bad that this thing has held up for seven years! with one paint job halfway through. And I didn't buy a thing this time- leftover wood from other projects, tools we had on hand, even reused a few screws that came out of the rotted wood. Though my husband says when I really need to rebuild it, we'll go buy new, properly treated lumber to last longer.

18 May 2020

celosia and temps

The temperature point for celosia is sixty degrees. Below that, they suffer. But I've found I have a bit of wiggle room with my coldframe. They've been doing nicely so far and several nights this week I've been able to leave them out, down to fifty-eight degrees they were just fine.
Fifty-six was too low, though. A few suffered that night, see the leaf wilt and curl:
They've already got flower spikes, I'm a week or two off in my timing.
Should have started them later than I did. Don't know if I'll get large blooms this year.

09 May 2020

taller!

My tomatoes are really ready to go in the ground.
Getting top-heavy in their containers. (That's celosia in the coldframe).

28 February 2020

mini greenhouse

More seedlings up! Tomatoes, nicotiana and celosia. I didn't take pictures of them though, because I was more excited about this. Finished my mini greenhouse! I'm proud enough of it, feel that it actually deserves the name.
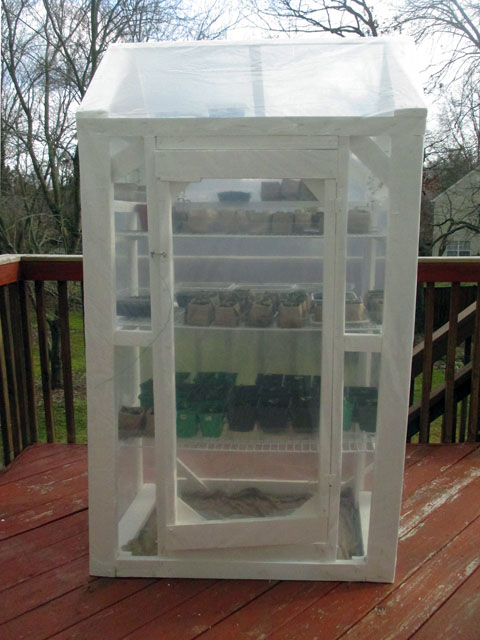
Moved up onto the deck- you can see it's twice the size of the old one. (This photo before I wrapped -or skinned- it in plastic).
Here's the regular coldframe in the picture, too- which got spiffed up with wood glue in the cracks to block draft, and a new coat of paint.
All my current seedlings are in the little greenhouse, and I've only used half its capacity!
Now I'm off to build a bench, so I don't run out of room for the seedlings when they need to come into the house at night.

23 February 2020

tiny house

My little coldhouse is in regular use now!
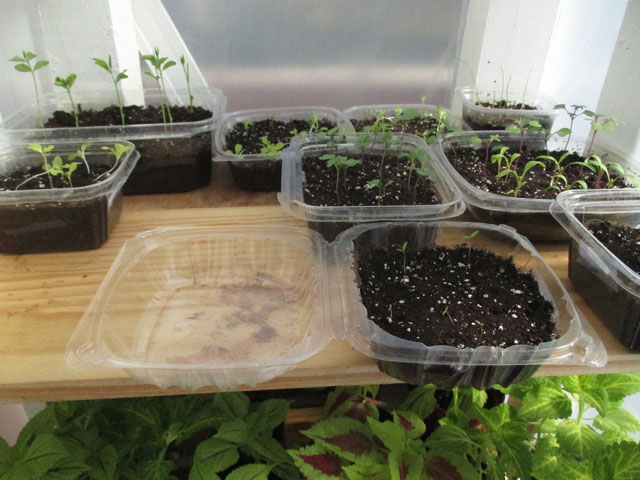
Top shelf seedling trays:
closer look:
Middle shelf crowded with coleus:
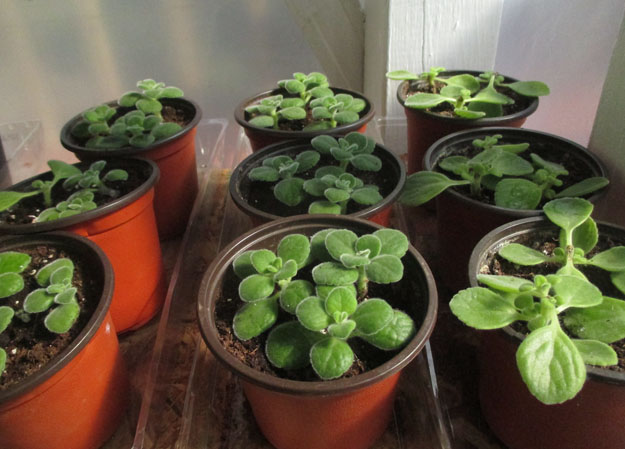
Further down, and last to go out when it's warmed up enough, a bunch of cuban oregano cuttings. My parent plant needed a trim!

23 April 2019

today was hot

so I moved all the young plants out of the plastic coldhouse and into shade on the deck table
Outside temp was just above eighty, inside the coldhouse was 120°. I was hoping it could get hot enough in there to sterilize the potting soil my tomatoes used last year- I saved it all but not sure if they had a disease so hoped to kill whatever pathogen might have been. However (according to info online- reliable? not sure-) it has to get up to 160° for that.
Some of my cosmos are as tall as the coldframe sides now
A lot of them are budding
A few mairgolds have opened already
the amaratto basil sure is pretty
Zinnias are getting too big for their little folded pots
Tomatoes shot up overnight it seems- I'm ready to plant them
This one chervil still in a small pot, was sheltered longer than those I put in the planter box, and looks better- more upright and sprightly
Chives are budding! and near to filling their pot completely.

07 March 2019

different temps

I have a thermometer in each coldframe now. And I'm surprised. I thought the new one, with solid wood sides and glass lid, would stay warmer than the upright one that's wrapped in plastic sheeting. Nope. The coldhouse warms up sooner, and stays warm later in the evening (by at least two hours) than the traditional cold frame. I thought it was mainly because the coldhouse, being taller, catches sun earlier in the day. But today was cloudy and overcast, and my coldhouse was 50° while the coldframe still below freezing. This makes me want to build another upright coldframe, and sell the window-topped one. (It's also much easier to get plant trays in and out of the coldhouse, as I don't have to prop the lid open, or kneel on the ground.)

28 February 2019

new coldframe

I finally finished my coldframe. (Now going to always refer to the standing, plastic-wrapped one as my coldhouse, to avoid confusion). Today it got a paint job
I removed two of the smaller muntin so there are fewer cross pieces casting shadow. The plastic was cracked anyway. It's ready for use.
After the snow passes! We're due for another four inches tonight. So I'm extra glad I didn't remove leaf mulch (I'll replace with fresh spring compost) yet, around the perennials. To protect from cold I only need to bring my seedlings in, and cover the emergent plants in the herb bed with cloches. It's not going to be cold enough tonight to necessitate covering the camellia.

19 February 2019

new coldframe

I finished making my second coldframe.
the old window lost a few cross strips- the muntin- so I will have to be careful one of the glass panes doesn't fall out
Not perfect- once again the edges aren't all exactly straight, I had to fill some gaps with wood glue and bits of cedar shim. But it's much sturdier than the last one I made, more spacious and I liked using metal brackets to hold the corners, instead of posts. So I don't run up against them when it's absolutely full of plant pots and trays.
It needs a paint job, and then can go outside, get put to use!

07 February 2019

I'm building stuff

In process is a second coldframe, traditional type open box lidded with an old window (saved from our basement remodel). My coldframe house is almost big enough for all the seedlings I usually start- this way there is spillover room, plus I could put it out at ground level in the garden, maybe try and grow some lettuces or chard into winter months? Plus who wants to waste a good old window.
I'm making a few more garden beds! Using leftover pieces of planking from the deck repair my husband did last summer. (It's 'ground contact' lumber treated with copper azole- I looked it up- considered safe for building raised beds).
I've made two new spaces- the larger one is more cobbled together, some pieces are square post lengths, dug into the ground a bit.
It's evening out the edge of lawn, where the stairs extend out from the deck area. I'm hoping to train more clematis up the deck support poles here (which will also shield the two stumps where my old sink sits for mosquito larvae each summer).
I wish I was better at building stuff. You can see my new, smaller bed (needed space to walk around it) isn't straight, and one side is made of so many small pieces patched together it's very uneven. I braced outside the joins with bamboo pieces driven into the ground.
Did more of that here too, where one wooden edge of a bed against the garage wall collapsed last fall. Instead of rebuilding or replacing, I dug out some soil to prop it up straight again, and hammered bamboo pieces at intervals to hold it in place. Temporary fix. (Incidentally, it was lovely to feel how loose and soft the dirt is in this older bed now, compared to the heavy sticky clay mess where I started pulling out grass in the new unworked spot).
I should have cured my bamboo poles (remainders from when I made bamboo leaf mulch last summer) inside the house- a lot of them are moldy and breaking apart. The longest ones that are still strong I'm saving to maybe use for beans, if I decide to grow pole beans this year (iffy about that because of how poorly they've done against the bugs every time). The weak ones I broke up, they'll go in the bottom layer when I turn my compost pile, provide some aeration for a while.
I'd really like to have a load of landscaping bricks (like that lower left in this pic) to make all my beds sturdy, a few inches higher, and uniform in appearance- it really looks embarrassing sometimes how patched together my garden space is. But my husband balked when he saw the price of new bricks and how many I'd need! I haven't been able to find anyone taking apart an old patio, again. This larger bed in foreground is in the worst shape- I don't like that it's half stone, half wood either.
The bed by the tree stump got reworked, a bit. I dug out the space against the stump to straighten the smaller bricks there, pulled out a lot of the cedar shim wedges that block the gaps between the edging bricks- soil had crept behind them- and hammered them back in, lower so not as visible. Shoved a few under bricks from the outside to level them again, where they were leaning out.
For all my dissatisfaction at the patchy appearance, when I stand and look over the space- my little domain- eight planting beds now, it will be nine or ten when I'm finished- I feel quite pleased with anticipation at the prospects of growing stuff!